封面PID=112536466
前段时间为了排查路由器的一些服务问题,去翻系统日志,发现自己的路由器因为有在公网上被扫了几百次(好家伙,我都换端口了还能扫😅),整个系统日志全是各种ssh连接失败的报错。虽然禁用了密码登录,但是整个日志被刷的太乱,导致正常运维都成问题,属实是伤害不高侮辱性极强了。于是为了保证我的路由器不被这些脚本小子搭讪,开始研究如何使用Fail2Ban来自动拉黑这些扫描的脚本机。
安装
这块没什么好说的,不管是官方源还是目前国内普及的lean lede源都有fail2ban的包,直接opkg就行
安装好后在终端中输入which fail2ban-client,验证下是否安装成功,正常的话会输出对应的执行文件路径。
配置
默认配置文件目录在/etc/fail2ban。Fail2Ban需要配置两个地方,一个是过滤规则,或者说是正则匹配逻辑;一个是配置具体封禁策略,包含hit次数,日志位置等。
过滤规则
/etc/fail2ban/filter.d下是项目自带的默认过滤规则,而官方本身OpenWrt的dropbaer规则不能直接使用,不知道是不是因为迭代没跟上还是怎么的,dropbear的日志匹配逻辑对不上,因此需要我们自己修改过滤规则。下面给出我自己配置的规则供参考,把官方的dropbear.conf改了即可:
 1
 2
 3
 4
 5
 6
 7
 8
 9
10
11
12
13
14
15
16
17
18
19
20
21
22
23
24
25
26
27
28
29
30
31
32
33
34
35
36
37
38
39
40
41
42
43
|
# The standard Dropbear output doesn't provide enough information to
# ban all types of attack.  The Dropbear patch adds IP address
# information to the 'exit before auth' message which is always
# produced for any form of non-successful login. It is that message
# which this file matches.
#
# More information: http://bugs.debian.org/546913

[INCLUDES]

# Read common prefixes. If any customizations available -- read them from
# common.local
before = common.conf

[Definition]

_daemon = dropbear

datepattern = ^%%a %%b %%d %%H:%%M:%%S %%Y

prefregex = ^%(__prefix_line)s<F-CONTENT>(?:[Ll]ogin|[Bb]ad|[Ee]xit).+</F-CONTENT>$

failregex = ^[Ee]xit before auth from <<HOST>:\d+>:\s.*$

ignoreregex =

# DEV Notes:
#
# The first two regexs here match the unmodified dropbear messages. It isn't
# possible to match the source of the 'exit before auth' messages from dropbear
# as they don't include the "from <HOST>" bit.
#
# The second last failregex line we need to match with the modified dropbear.
#
# For the second regex the following apply:
#
# http://www.netmite.com/android/mydroid/external/dropbear/svr-authpam.c
# http://svn.dd-wrt.com/changeset/16642#file64
#
# http://svn.dd-wrt.com/changeset/16642/src/router/dropbear/svr-authpasswd.c
#
# Author: Francis Russell
#         Zak B. Elep
|
接下来,我们需要把系统日志重定向到系统文件中,使用以下命令操作:
1
2
3
4
|
mkdir -p /tmp/log
touch /tmp/log/system.log
uci set system.@system[0].log_file='/tmp/log/system.log'
uci commit
|
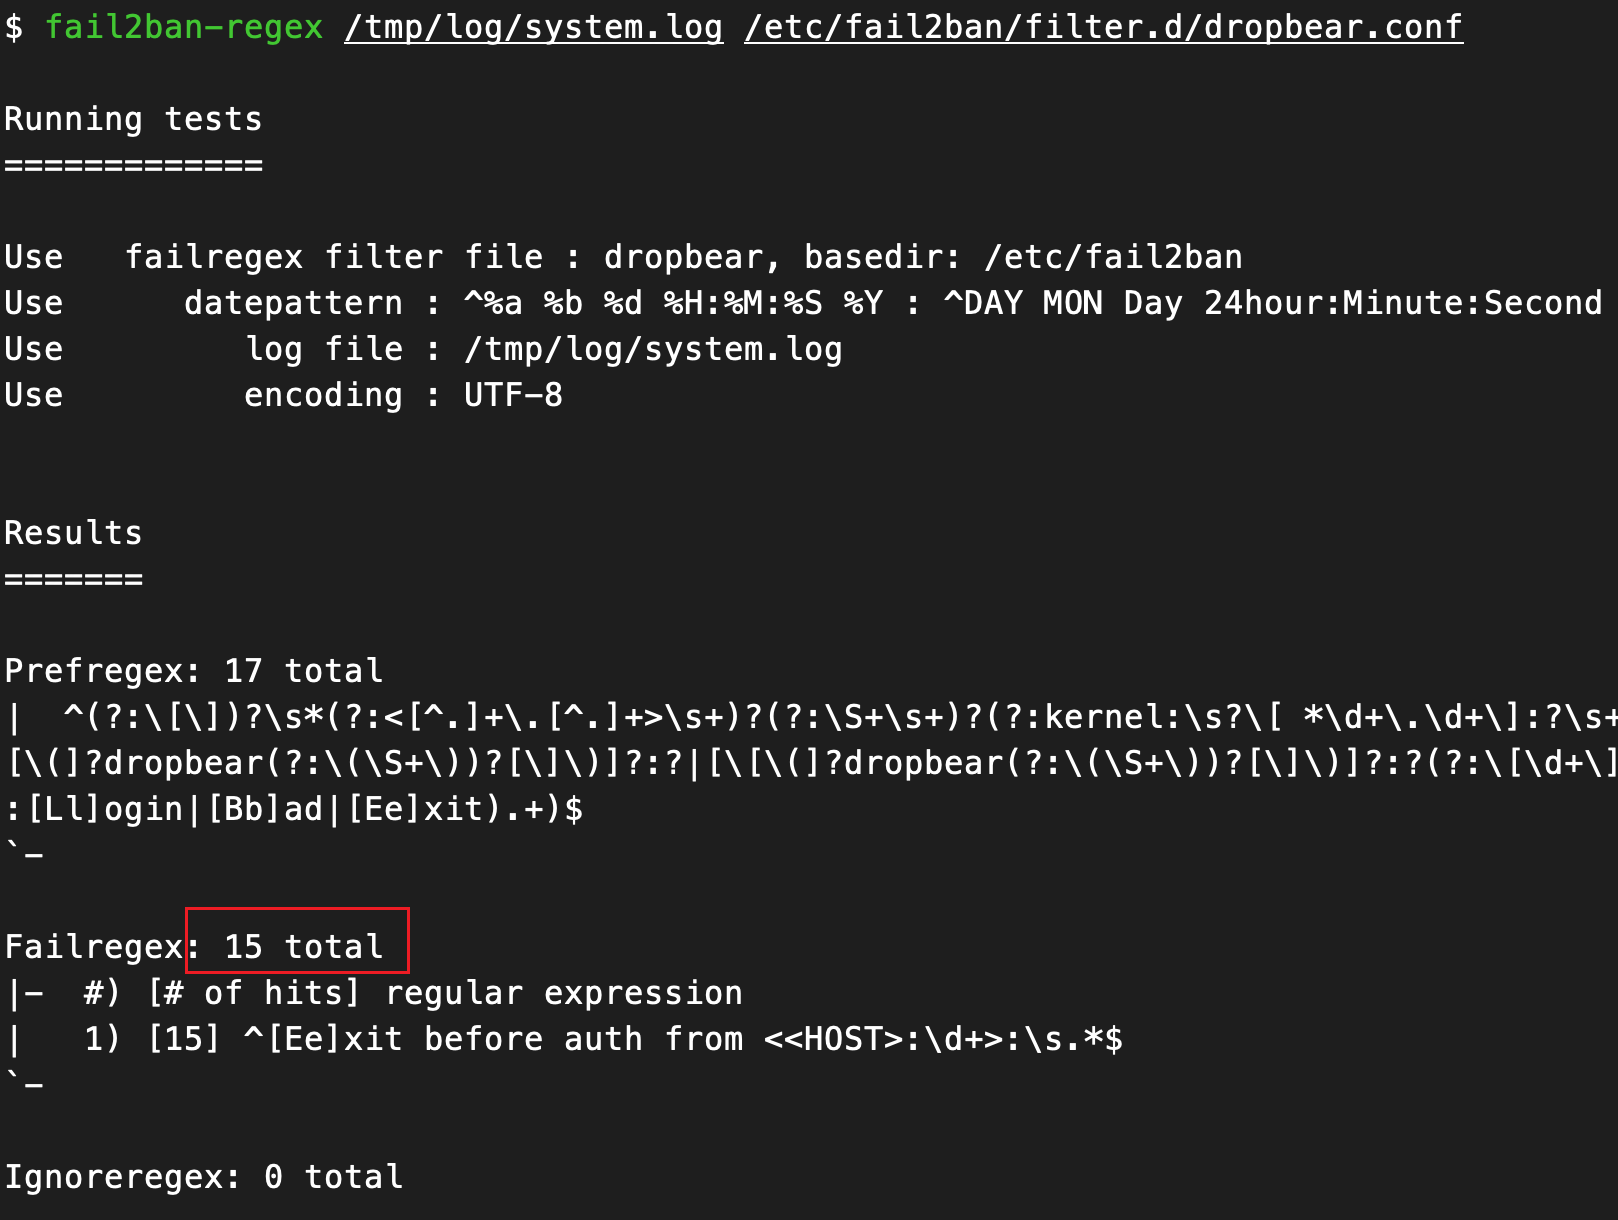
这套过滤规则可以过滤出登录失败的主机ip。fail2ban也有专门的命令可以测试配置有效性,可以使用fail2ban-regex /tmp/log/system.log /etc/fail2ban/filter.d/dropbear.conf命令测试过滤匹配是否正确。
封禁策略
随后我们还需要配置封禁策略,这个策略一般是放在/etc/fail2ban/jail.d目录下,我们可以在这个目录下面新建一个策略名为dropbear.local的文件,在其中配置命中策略:
 1
 2
 3
 4
 5
 6
 7
 8
 9
10
11
|
[dropbear]

enabled = true
filter = dropbear
# port为你对应的ssh端口
action = iptables[port=22, protocol=tcp]
# 上一步创建的日志文件路径
logpath = /tmp/log/system.log
maxretry = 3
bantime = 604800
findtime = 86400
|
这个封禁策略会将在一天内ssh登录失败3次的ip封禁一个星期。
最后,我们使用命令fail2ban-client start启动Fail2Ban。
效果
使用命令fail2ban-client status dropbear,查看当前dropbear规则的封禁情况
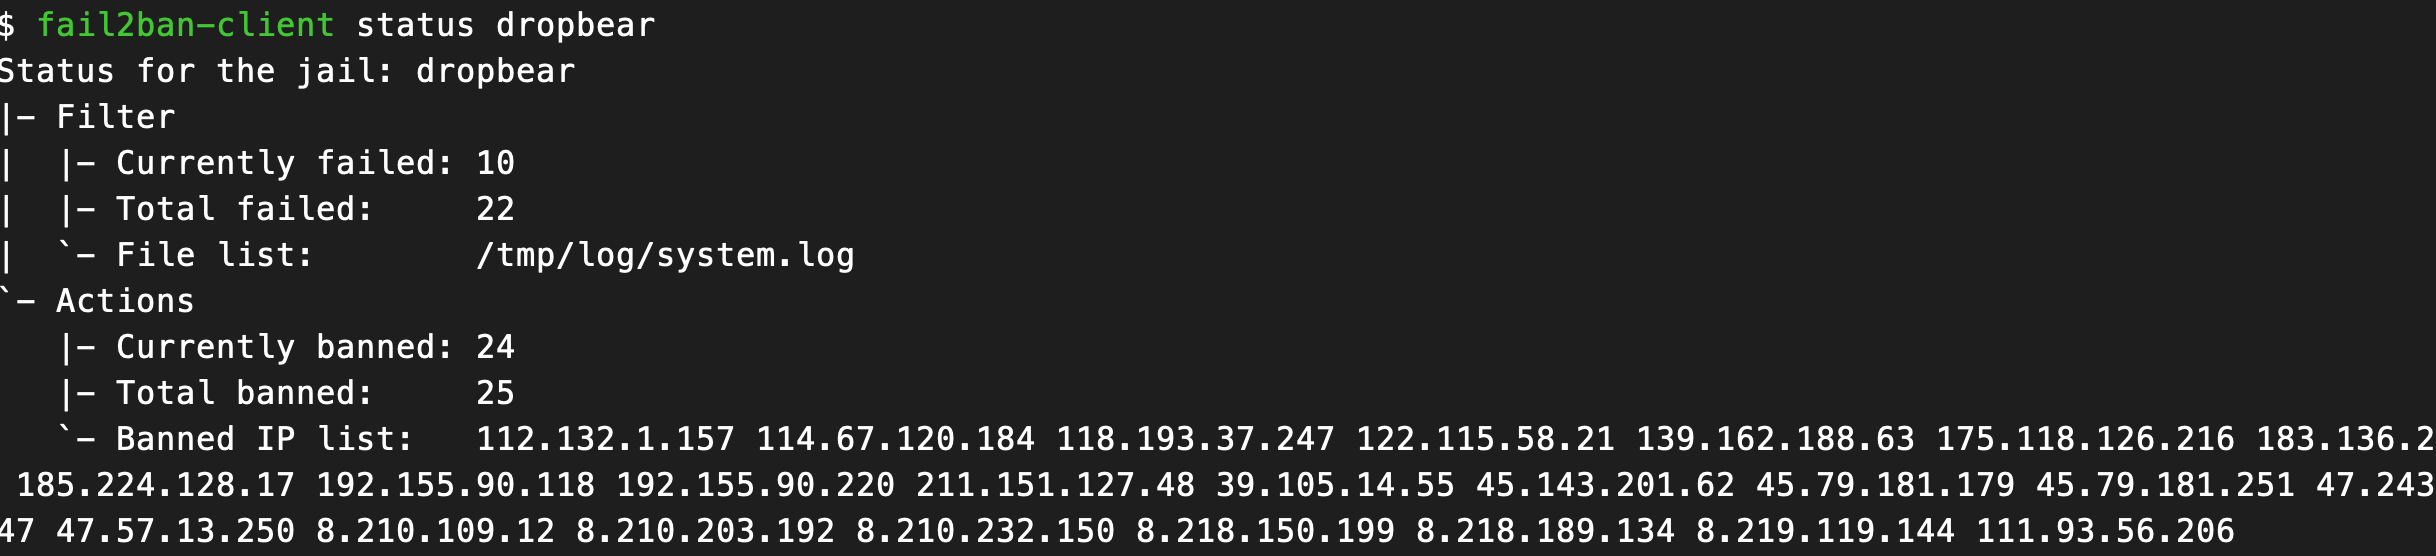
可以看到,这封禁ip的数量还真不少,用ipip查了下,国内国外的都有。
进阶
luci登录封禁
既然我们都把dropbear配了登录封禁,那么就顺道给web登录页面也配一个吧😉
具体步骤和dropbear一样,由于我用的是nginx作为luci的服务器,而且修改了日志格式,因此以下配置仅供参考。
 1
 2
 3
 4
 5
 6
 7
 8
 9
10
11
12
13
14
15
16
17
18
19
20
|
[INCLUDES]

# Read common prefixes.If any customizations available -- read them from
# common.local
before = common.conf


[Definition]


_daemon = luci

datepattern = ^\[%%d/%%b/%%Y:%%H:%%M:%%S \+0800\]


prefregex = ^.*POST.*<F-CONTENT>(?:403).+</F-CONTENT>$

failregex = ^403.*from <HOST>$

ignoreregex = ^403.*from 127.0.0.1$
|
其中过滤规则的ignore是因为luci在第一次进入主页时会触发本地反代403,因此需要忽略。日期格式匹配可能需要自行根据自己的nginx日志进行调整。
最后加上封禁策略:
 1
 2
 3
 4
 5
 6
 7
 8
 9
10
|
# luci web
[luci]

enabled  = true
filter   = luci
action   = iptables[port=https, protocol=tcp]
logpath  = /tmp/log/nginx/access.log
maxretry = 5
bantime  = 604800
findtime = 1800
|
重启Fail2Ban,收工!